Monday, December 5, 2011

Snowballs

These, again, are my one of my mom's famous recipes. I remember her always baking these during Christmas time! I wish that this year I could go home for Christmas and do all the family traditions we usually do, but hey! I can't complain, I'm going to Hawaii!
These are absolutely delicious.. Most people make these without the chocolate kiss in the middle but I think that the kiss adds a little Umph to it! I highly recommend you put those puppies in.
 So first, we actually aren't going to preheat the oven first!

Cream together,
1 Cup of Butter (2sticks)
1/2 Cup of Powdered Sugar
1 Teaspoon of Vanilla
Once fluffy, Add
2 1/4 Cup of Flour
1/4 Teaspoon of Salt
Then, Add
1/2 Cup of Finely Chopped Peacans


Once mixed well, wrap the dough in saran wrap and place in the fridge for about an hour.
 Once chilled, preheat the over to 400 degrees F. Shape the dough into about 1 inch balls, take a chocolate kiss and stick it in the middle. Bake for 8-10 minutes and do not let it brown!

Now, take a small bowl and put about 1/2 Cup of Powdered Sugar. Once balls have cooled a little but still are warm, place the balls individually in the bowl and roll them. Once those have cooled completely, strinkle some more powdered sugar over all of them to get the snow effect!


<3

Thursday, November 17, 2011

Easy Peasy Mini Cheesecakes

 I remember my mom used to make these all the time when I was little and I always LOVED them. They are sooo simple, so quick and easy but delicious. Tonight, I went to a Deaf Community Thanksgiving Dinner which was a blast, (it was definitely the quietest thanksgiving I've ever had ;)!) and I brought this as a dessert. It was perfect! I got a lot of people coming up to me telling me that this dessert was their favorite :)

so lets begin by preheating the oven to 350 degrees!

Line the cupcake pan with some tinfoil cupcake liners (tinfoil I found works the best with these.) and place
Vanilla Wafers
in each cupcake holder.

Then take a medium sized bowl and with an electric mixer, beat
2 (8ounce) Packages of Cream Cheese
3/4 Cup of Sugar
2 Eggs
1 Teaspoon of Vanilla Extract
once smooth, light, and fluffy, Fill each cupcake liner with this mixture, almost to the top, but leave enough room for the Cherry Pie Filling on top.
Bake for 15 Minutes and let it cool.

Depending on when you want or need them, keep them in the fridge, and don't put the Cherry topping until you are about to serve them, or eat it for best taste. Otherwise, the cheesecake could get a little soggy!
Easy right? I hope it turns out well!

Bec

Friday, November 11, 2011

Hummmmingbird Cupcakes

These were so good... and what I also like about them, is that you can put anything in them and it will still taste amazing! you can put nuts, chocolate chips, etc, you don't even need to put anything in it because it will also be soooo delicious! It was also very hard to take a good picture of it for some reason...
 First preheat the oven to 350 degrees!

In a small bowl mix the
3 Very Ripened Bananas
1/2 Cup of Finely Chopped Pineapples
1/2 Cup of Flour
set aside.

In a medium bowl whisk together the
2 1/4 Cup of Flour
1 Teaspoon of Baking Soda
1 Teaspoon of Cinnamon
1/2 Teaspoon of Nutmeg
1/2 Teaspoon of Ground Ginger
1/2 Teaspoon of Salt
set aside.

In a large bowl beat
3 Eggs
1 3/4 Cup of Granulated Sugar
until thick and light.
While beating add in
3/4 Cup of Vegetable Oil
Once mixed, scatter the dry ingredients over the egg mixture and gently fold them together to make a loose batter. Now gently fold in the banana mixture.

Now, this is the place where you get to decide what you want to put in it. I would recommend either chopped pecans or chocolate chips! If you don't fancy either of those, than plan is amazing as well :)
Now for the frosting, very easy.
In a medium bowl beat
2 (8-ounce) Packages of Cream Cheese
12 Tablespoons of Butter
Once smooth and fluffy, add
A Few Drops of Lemon Juice
1 Teaspoon of Vanilla Extract
2 Cups of Confectioner's Sugar


Banana's and Pecans are wonderful garnishes :) Hope you enjoy!

Saturday, October 8, 2011

Heavenly Angel Food Cake

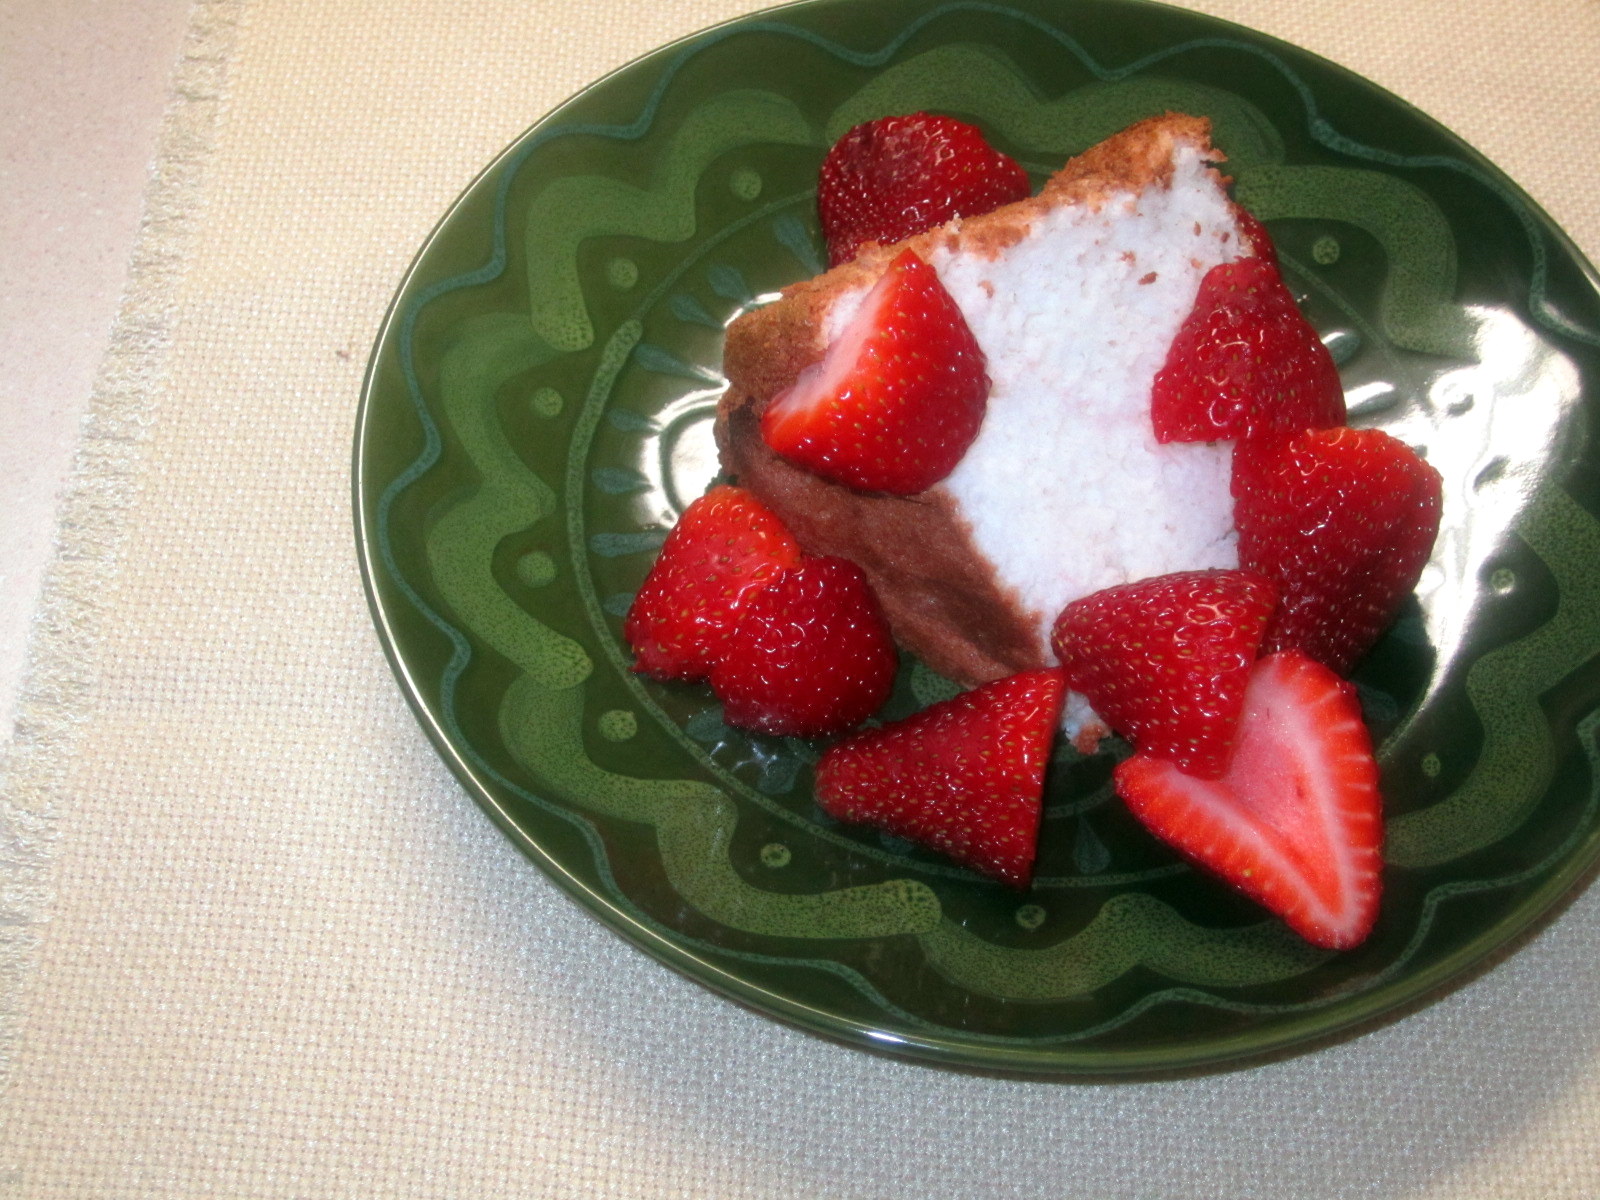
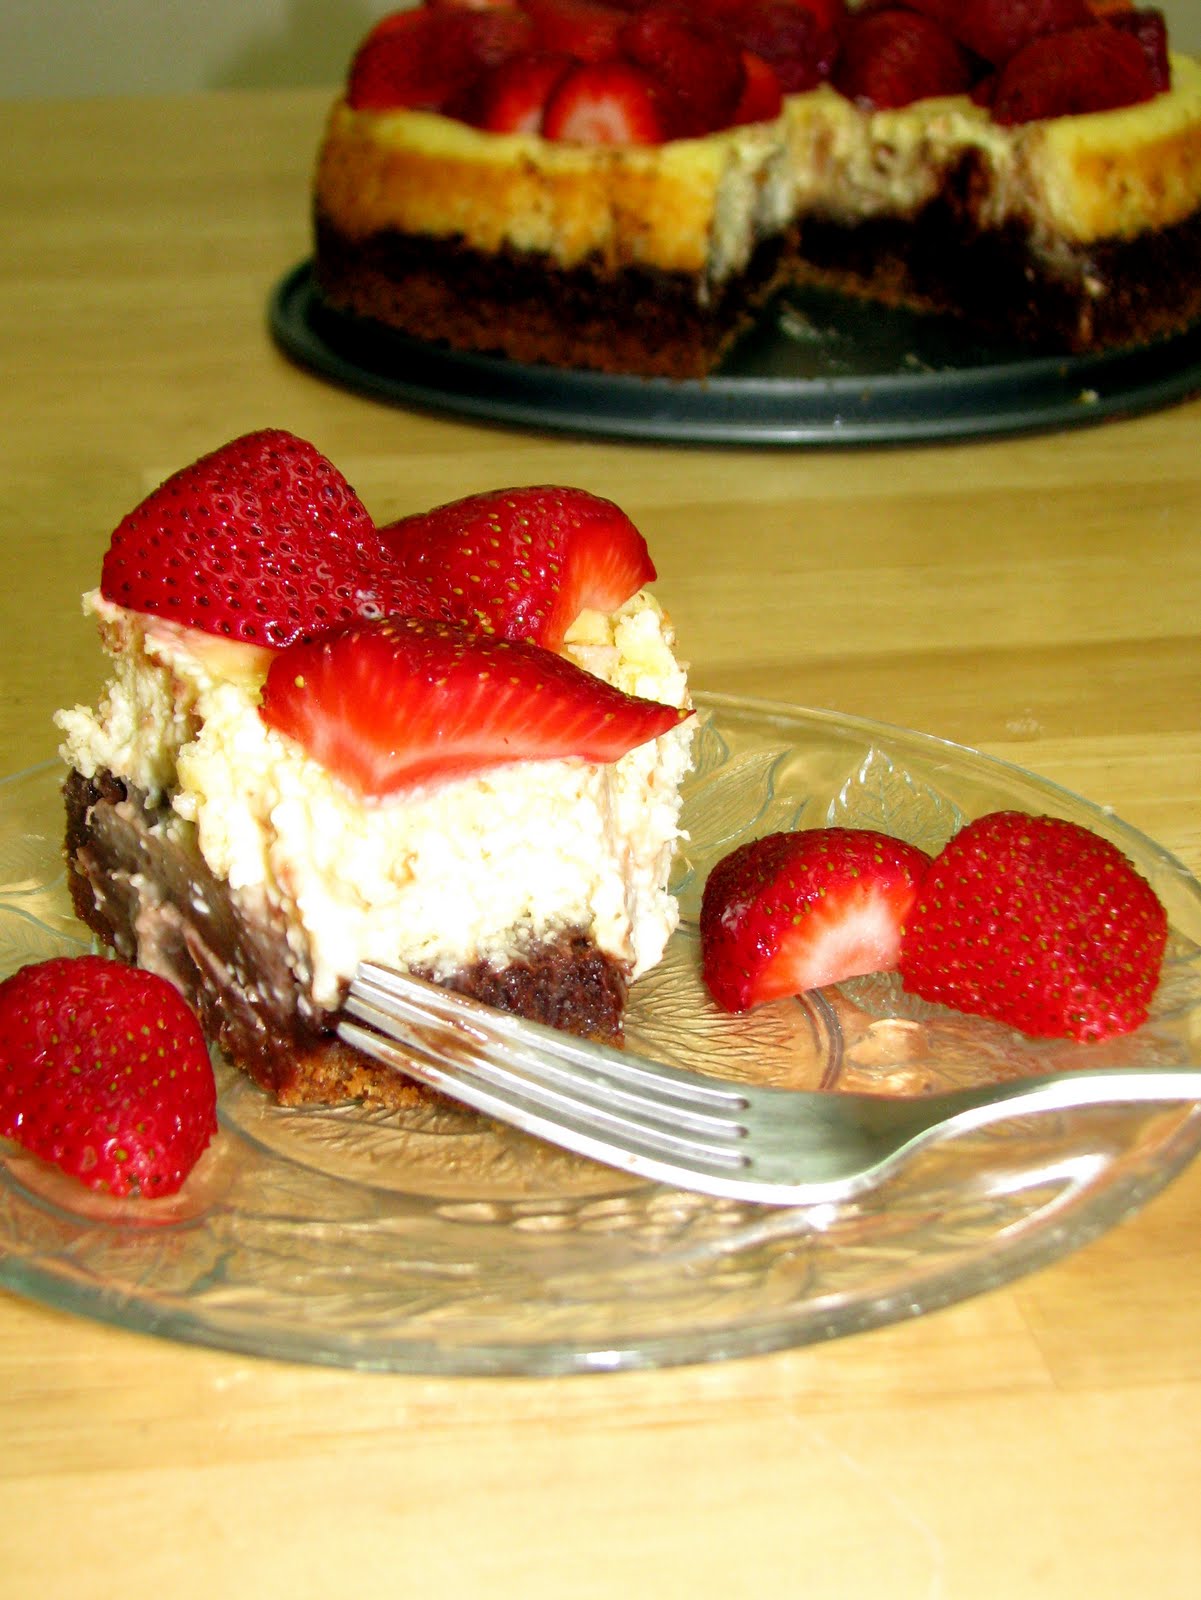
Surprised that this dessert doesn't have chocolate in it?
Don't worry all you chocolate fanatics! it's worth it. Delicious. My roommate, Bonita, made this with me. She actually showed me the recipe! This was our desert for tonight after our dinner and salad we made together. It was this potato casserole... (there is some fancy name for it but I can't remember it for the life of me)... as well as Romaine lettuce, strawberries, glazed pecans, and balsamic vinaigrette. Tonight was just an overall great night... if were talking about food that is :) other than that, today has been a very unlucky day for me in the funniest ways!

There is even a strawberry sauce I made up to go with it but I don't have any pictures of it. I might have done that on purpose. The sauce doesn't look all that appetizing but tastes phenomenal with this cake! It will be at the bottom, it's not complicated, it's so easy a caveman could do it! But seriously, just keep in mind I haven't perfected it yet ;)

So, Here we go!
First, lets move the oven rack to the lowest position and than heat the oven to 375degreesF

In a medium bowl, mix
1 1/2 Cups of Powdered Sugar
1 Cup of Cake Flour
1 1/2 Teaspoons of Cream of Tartar
Set aside :)

Now, in a LARGE bowl, beat
12 Egg whites (1 1/2 cups)
You are going to do this with an electrical mixer on medium speed until foamy.

Once foamy, add
1 Cup of Granulated Sugar
1 tablespoon at a time! Along with
1 1/2 Teaspoons of Vanilla
1/4 Teaspoon of Salt
Continue to beat until stiff and glossy meringue forms - Don't Under beat!

Sprinkle on top of the Meringue the sugar-flour mixture 1/4 cup at a time - sprinkle it evenly on top - and then fold the sugar flour mixture just until it disappears. (Be gentle! If you're not, your batter will start deflating!)
Once all the sugar-flour mixture is in your batter, push the batter into an ungreased angel food cake pan, 10x4. With a metal knife, cut through the batter - this will get rid of those big air bubbles.

Now, bake for 30 to 35 minutes! Once done, immediately turn upside down onto a heatproof funnel or bottle until cooled, about 2 hours. Loosen the side of the cake and than remove from the pan - you can eat!
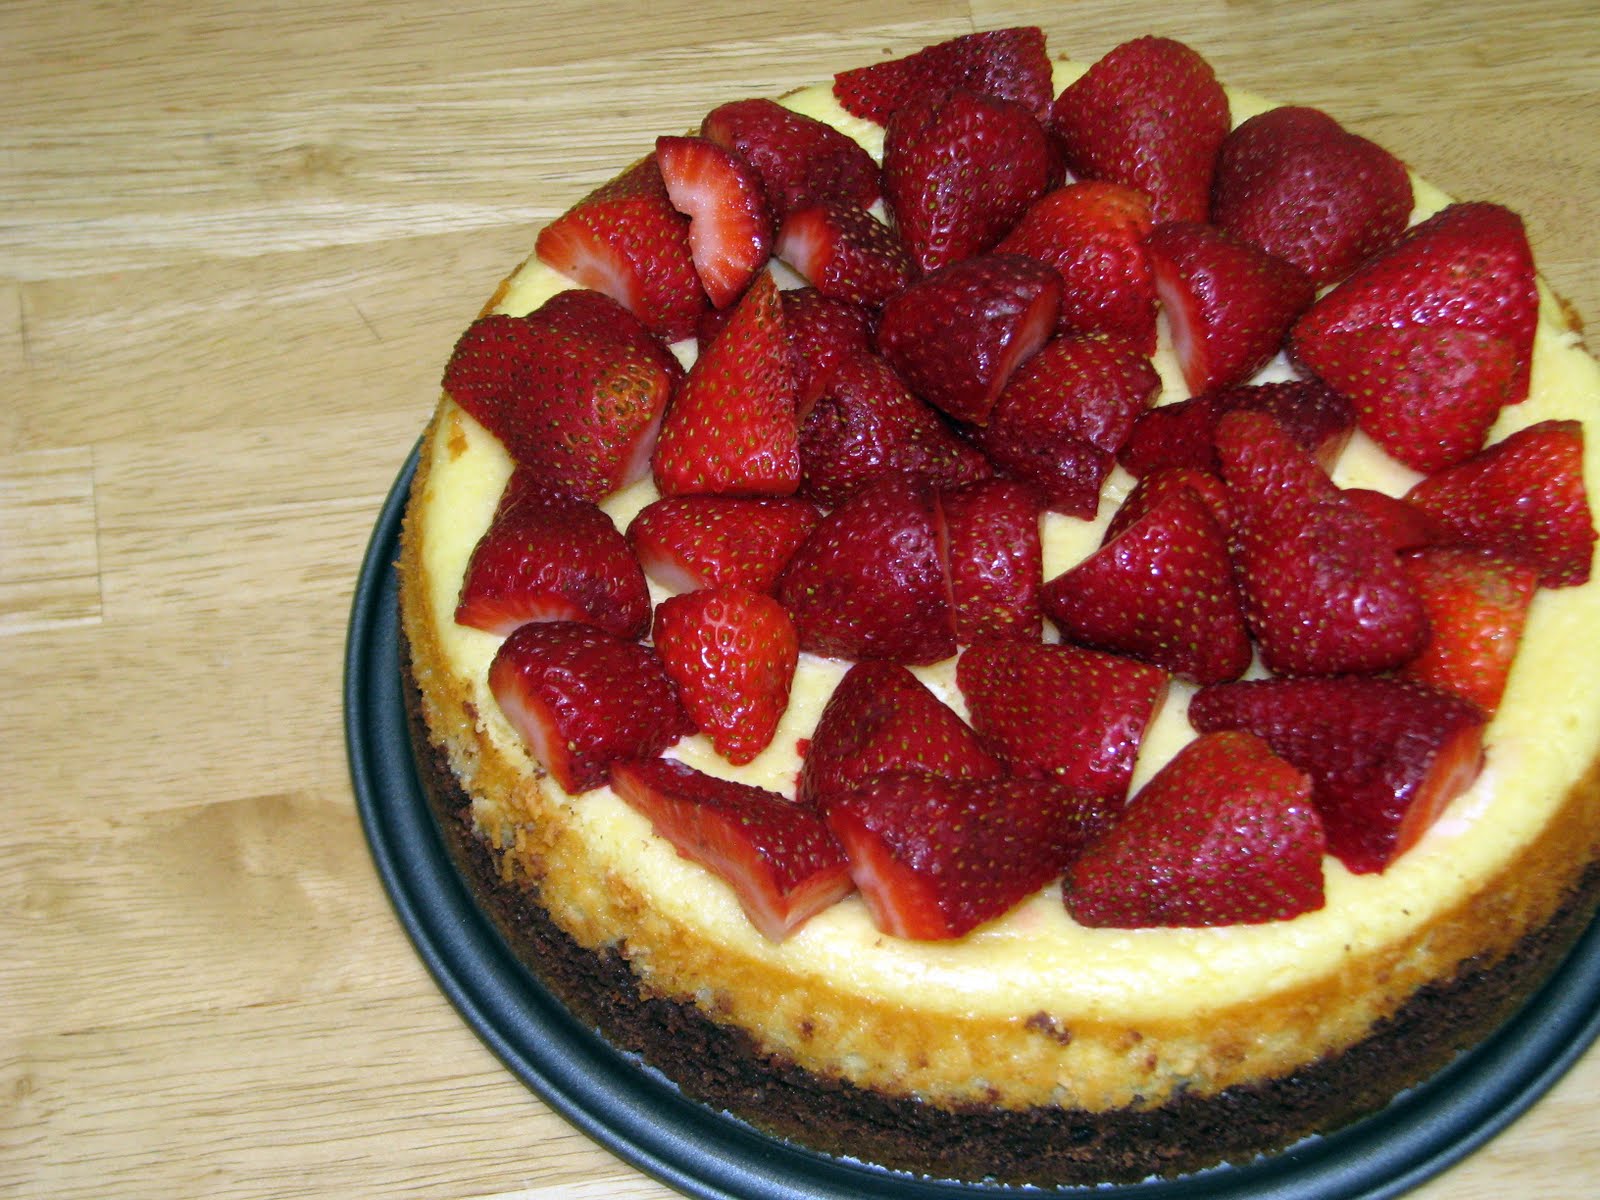
Now for a nice little sauce?

all you need are
1 Pack of Fresh Strawberries and about
3 Tablespoons of Sweetened and Condensed milk
Blend together with an electric mixer and than pour your desired amount on top of your cake. Best with freshly cut strawberries as well as the sauce :)

Enjoy!

Friday, October 7, 2011

Go Bananas! Bread

Mmm.. Don't you just love the smell of banana bread cooking in your home? I baked this today and it made my apartment smell like heaven. More good news is that I baked this hours ago and my place still smells wonderful! I was dying for something to bake, I haven't baked something new in a while... I than saw the brown bananas on my counter and knew right than what I should bake :)

Preheat the oven to 350 degrees!
and a perfect loaf pan size for this is a 9 1/4 by 5 1/4 by 2 1/2 inch. I actually didn't know that and I went to the store and just picked up a random sized loaf pan and the batter fit perfectly! What luck.

So in a medium sized bowl, blend
3 Ripe Bananas (brown)
1/2-3/4 Cup of Sour Cream (depending if you want it really moist or not)
2 Eggs
1 1/2 Teaspoons of Vanilla
Once those are all blended together, set it aside.

Than, in another medium sized bowl (preferably an electric mixer), swift together
2 Cups of Cake Flour
3/4 cup and 2 tablespoons of Sugar
1 Teaspoon of Baking Soda
3/4 Teaspoon of Baking Powder
1/2 Teaspoon of Salt
Once that is sifted together, (this is the part where it would be easier if you have an electric mixer but if you don't have one that is totally fine, I didn't use one either... you just have to do a lot more work in combining it really well) Add
10 Tablespoons of Butter
and make sure it is blended really well.
Now, Add the banana mixture to it in 3 batches, mixing it in between each batch. And now you can either add in nuts or chocolate chips or even both! you can put in however much you want in it. I put in about 1 cup to 1 1/2 cups of chocolate chips :)

This part is what gets me... you have to cook it for about 1 hour and 10 minutes. I know, long! But make sure you keep checking up on it. The one today cooked a lot faster.. well, not a lot faster.. but it took about 52 minutes!

I hope you enjoy it as much as my roommates and I did :)

Wednesday, July 20, 2011

Homemade Style Chocolate layered Cheesecake

Can I just say that I find Cheesecake the hardest thing to bake and perfect; It is so difficult! But I decided to challenge myself this week and bake it. And hey, it turned out pretty good :) There was no purpose as to why I baked it, I just wanted to :) But I was craving something chocolate hence why I stuck in the chocolate layer at the bottom ;)

Lets begin by preheating the oven to 300 degrees this time!

Crust
In a medium bowl, combine
2 cups of Gram Crackers Crumbs
1/3 cup of sugar
1/3 cup of melted butter
Press the crust into the bottom and 1 inch up the side of the spring form pan. Bake for 6 minutes and let it cool
Chocolate Layer
Using a double boiler, melt
6 (1 ounce) squares of semi-sweet chocolate
6 tablespoons of butter
After that is completely melter, whisk in
1/2 cup of sugar
2 large eggs
2 tablespoons of All-Purpose Flour
Pour into the bottom of the cooled crust and bake for 15 minutes.

Cheesecake Layer
In a large bowl, beat together
2 packets of cream cheese
3/4 cups of sugar
Beat until creamy. Then add 3 large eggs, one at a time, beating well after each addition.
Then beat in,
1 teaspoon of Vanilla extract
1 tablespoon of All-Purpose Flour
1/2 cup of sour cream
Once all is well combined, pour onto the chocolate layer and bake for 1 hour. When you pull it out, the top of the cheesecake should be a little wobbly. When it is all done, gently run a knife around the edge of the cake to release the crust from the sides of the pan. Let cool completely. Once cooled, set in fridge for about 8 hours before serving.

and there you have it! It doesn't sound difficult, which it's not, the difficult part is just mastering it. For cheesecake, everything has to be be to the T, if you do one thing slightly wrong, it could not come out how you would want it :(
Mmm.. so delicious. The chocolate layer definitely adds a little Umph to it :)
I hope you enjoy!

<3

Thursday, July 14, 2011

Balmy Brownies

I made these for a surprise for my brother and sister in law... well it was supposed to be a surprise anyways. My sister gave it away. But they loved them! My brother said they were fudgey just like he likes them. They fall apart very easily and are very moist. Any brownie fan would love these!
Before anything -- preheat the oven to 350 degrees -- like always

Before you begin, here is a little secret! This will make it a lot easier to take the brownies out of the pan once they are all baked. Before pouring the batter into the pan, put a layer of tin foil that covers the bottom and sides. Then, spray the tin foil with Pam and proceed by pouring the batter onto the tin foil into the pan.

Gather together
4 sticks of unsalted butter
12 ounces of semi-sweet chocolate chips
6 ounces of unsweetened Baker's chocolate
Melt these together in a medium bowl over simmering water. Once everything is blended together and completely melted, take off the stove and set aside to let cool only slightly.

In a medium bowl, stir (don't beat)
6 large eggs
2 tablespoons of pure vanilla
2 1/4 cups of granulated sugar
Then pour the chocolate mixture into the egg mixture and stir until combined. Allow to cool until room temperature

In a large bowl, swift together
1 1/4 cups of all-purpose flour
1 tablespoon of baking powder
1 teaspoon of salt
Then add the cooled chocolate mixture into the bowl and stir together. Now, Pour into a 12 X 18 pan.
Bake for about 20 minutes. Once the 20 minutes is up, put a baking sheet over the brownies to prevent air from getting to the brownies and to keep air from getting out. Bake for another 15 minutes, until toothpick comes out clean. DO NOT OVER BAKE! let cool before cutting into 20 large beastly squares.